Moincwaftcito (talk | contribs) m (→General) Tag: Visual edit |
No edit summary Tag: Visual edit |
||
| (46 intermediate revisions by 37 users not shown) | |||
| Line 1: | Line 1: | ||
| + | <div style="color:white"> |
||
This is a list of some helpful '''Tips''' and tricks for [[Zombs.io]]. Feel free to add your own! |
This is a list of some helpful '''Tips''' and tricks for [[Zombs.io]]. Feel free to add your own! |
||
== General == |
== General == |
||
| − | + | The gold stash is the most essential part of a base. You can only place one, and once you place it, it becomes immovable. |
|
| + | The wave counter counts how far your base has survived. It will not start until you place your stash, and the higher wave you are, the stronger the zombie will be. |
||
| − | *Wave count won't start until the gold stash has been placed: place it when ready. |
||
| + | It's recommended to mine about 500-700 stone & wood before placing your stash, and to place it at the beginning of the night so you have more time to prepare. |
||
| − | *Place your gold stash right after night starts. That gives you the maximum amount of time to get gold and other resources. |
||
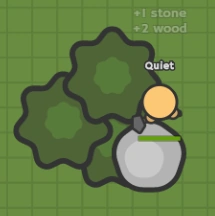
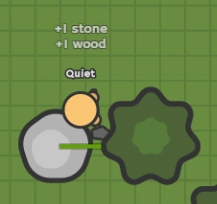
| + | You can active auto swing by pressing space, and you can deactivate by pressing space a second time. You can find trees and stone clustered together for easier farming. |
||
| − | *Get somewhere between 5 and 10 k stone and wood before placing gold stash to ensure you won't run out. |
||
| + | Dying will cause you to lose 25% of all you materials (Stone, Wood, Gold). Waves and towers will not reset, but your score will, so be careful! |
||
| − | *You can press space to auto mine. You can get as many resources per swing as spots you hit, so find clustered spots. |
||
| + | You can use Harvesters to increase mining productivity, to collect the resources, simply hit the Harvester once, or click 'Collect Resources'. |
||
| − | *Death takes away 25% of the resources but not wave difficulty, so be careful while moving around. |
||
| + | The maximum number of towers you can place depends on the number of people in your party. It's equivalent to the amount available with 1 player, times the number of people in your party. |
||
| − | *When collecting resources from a resource gatherer, just mine it as if it is a resource to collect what it has gathered. |
||
| + | If you are a beginner first try a game by yourself. Then later on you can try with other people! |
||
| + | |||
| + | if you are a pro and doesn’t have much time make 4 tabs then join the same server, make sure each tab harvests at least 1000 stone and wood before starting the base. When you are building make sure the other tabs are harvesting resources with woody. If your other tabs have lots of money make sure to make them place and upgrade harvesters then sell them to get the money (you could earn a fortune if you make them kill a boss each with a C.A.R.L) after you completed a emerald core start closing the tabs and invite other people so more people can help repairing also it won’t be so laggy. |
||
| + | |||
| + | If you open 4 tabs be sure to check on them often not only to make sure they are alive but to reduce the chances of crashing |
||
| + | |||
| + | You could also place your stash and then place a layer of wood around it, then add more layers for extra security. You could also surround the giant block with towers to ad more security and increase defense. I suggest you use cannon towers on the corners and use some melee towers, mage towers and some bomb towers. Also add some arrow towers. |
||
== Base == |
== Base == |
||
| + | Tip: Place your stash near a cluster of Trees and Stone for easy mining, but not too close, or it might obstruct your building placement. |
||
| − | *Consider making the base near a multiple [[Resources|resource]] spot, to reduce the effort of harvesting |
||
| ⚫ | |||
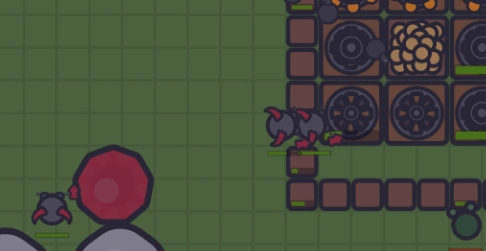
| − | *Do not build the base too close to Summoning Stones, as Bomb Towers may draw their attention when attacking zombies (Should not be a worry after you get a few tiers in as in these mobs will drop fast) |
||
| − | ::[[File:DemonAttack.png|frameless|200px]] |
||
| ⚫ | |||
| ⚫ | |||
| − | *Don't design a dispersive base: bigger means more expenses for walls and less focused tower fire. |
||
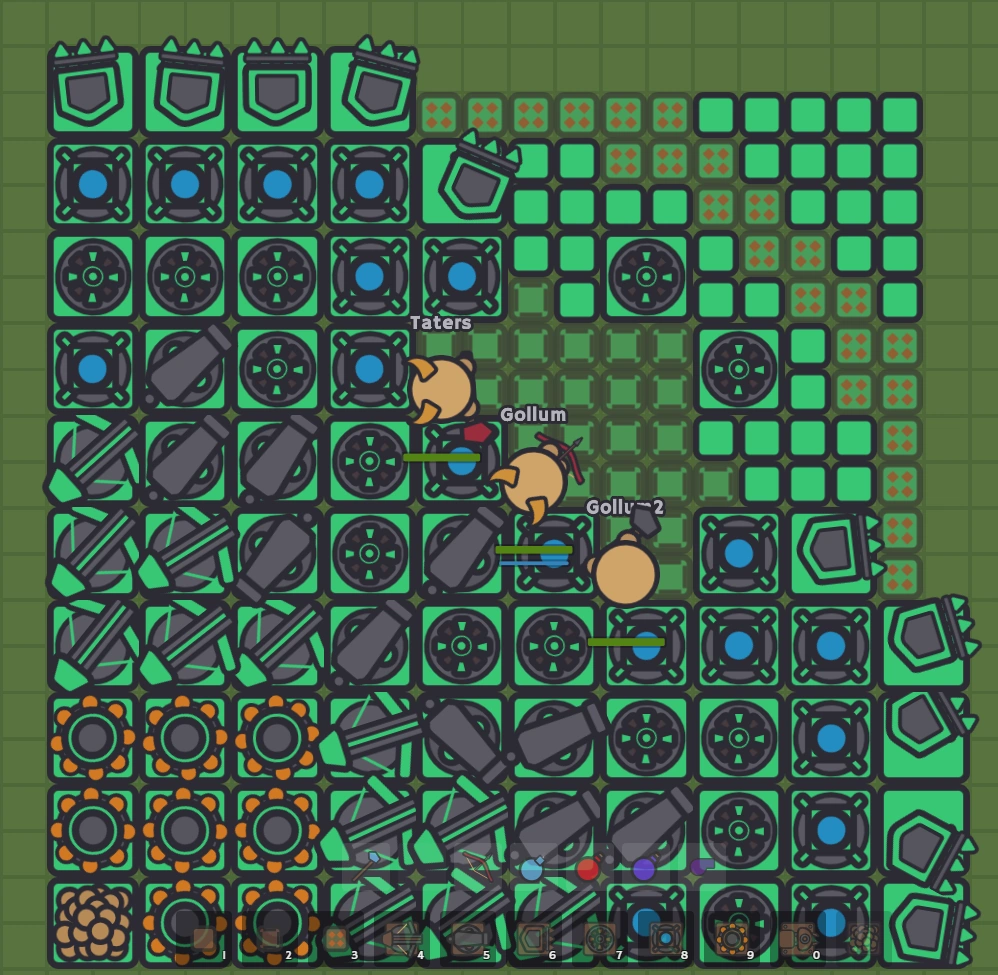
| + | File:Zombs 3.PNG |
||
| − | *Don't invest in a double layer wall until late-game, as it will likely waste resources and slow down progress. |
||
| + | </gallery> |
||
| − | *Towers have different damage and range, place them wisely. |
||
| + | |||
| − | *Do not include a resource spot inside the base: it will only increase the area to defend and the costs. |
||
| + | If you place you stash too close to Monster Camps, in lower waves they can be a nuisance to your base. |
||
| − | *While some zombies may get stuck in resource spots, don't use those as "base border": smaller zombies may pass between wall and resource; also towers won't have target sight. |
||
| + | It's not recommended to make your base perfectly symmetrical. While it may look nice, Zombies spawn differently each side of the base. However, it is recommended to build your base symmetrically initially, since this allows you to figure out which sides the zombies are stronger on, and the base can be quickly modified after. |
||
| + | : |
||
| + | :<br /> |
||
| + | ::[[File:DemonAttack.png|frameless|200px]] |
||
| + | If your only starting to play, then start building your base as soon as night starts. That way no zombies will spawn and thus you will have double the time to make your base and prepare for the waves |
||
| ⚫ | |||
| + | |||
| + | Don't use a layer of walls early game, as it tends to be a waste of resources. It may be necessary to use them later on as the zombies get progressively stronger. |
||
| + | Try to place towers based off their radius, knockback, AOE and damage. Example: Bombs Towers have high radius and high damage, with slow fire rate; Arrow Towers is single target, fast firing and have a bigger and bigger radius when upgrading (approaching Bombs Towers' range at tier 8). |
||
| + | Try not to build your base directly around Trees and Stones. They can make it hard to place building in the right spots, and leave your base with weak points. |
||
| + | When going AFK in your base, it's recommended to AFK bomb, by using the Bomb weapon, and pressing space to autohit. You can use CARL to increase the effectiveness of this. |
||
| + | |||
| + | Upgrade order: First you must upgrade your gold stash, so you can upgrade everything else. After that, upgrade your resource harvesters and gold mines. It is recommended to upgrade your main knock-back towers after this. Everything else to upgrade or not is your own choice. |
||
== Bosses == |
== Bosses == |
||
| − | + | After every 8th wave (9th, 17th, 25th, 33rd, 41st, 49th, 57th, 65th, 73rd, 81st, 89th, 97th, 105th, 121st), a boss wave occurs. If you attack every boss with C.A.R.L, when the boss dies you'll get a gold bonus (20k~500k depending on the wave). |
|
| + | |||
| − | *If you're on a team, the whole team gets the bonus but only if all the bosses are hit. If you only hit 3 of 4 you get nothing! |
||
| + | The number of bosses the spawn is equal to the number of teammates in your party. |
||
| + | |||
| + | Towers hardly do any knockback to bosses. |
||
== Shop Upgrades == |
== Shop Upgrades == |
||
| + | Try to only upgrade what you need. If your base can handle zombies on its own, focus on upgrading your pickaxe to help upgrade it faster. If it needs help, focus on upgrading your pickaxe and spear. |
||
| − | *Do not rush spending gold into player's upgrades: a tier IV axe can be enough to max all buildings. Weapons really improve from tier V, but the cost is over 20k gold and it might be better spent elsewhere until end-game. Also later on the gold will generate faster. |
||
| − | + | While using spear, it's important to keep in mind you can take a lot of damage. Invest in a shield, or a Bow or Bomb for ranged combat. |
|
| − | + | Health Potions can be useful when in a pinch. Use F to instantly use it, but keep in mind they cost 100 gold and have a cooldown. |
|
| − | *If actively fighting zombies, consider investing in a shield tier 1 instead of using potions. (So you won't get tricked by the blue zombies and higher + Extra health will help fighting zombies.) |
||
| − | *After gold mines tier V, timeout can generate a positive income. At tier VIII the bonus gold is 23.6k/timeout. |
||
== Other Players == |
== Other Players == |
||
| − | *Playing with friendly or semi-friendly people's bases increases the chances of survival. |
||
| − | *Consider partying with other players from the start although remember, entering a team will reset the current progresses. |
||
| ⚫ | |||
| ⚫ | |||
| ⚫ | |||
| ⚫ | |||
| ⚫ | |||
| ⚫ | |||
| ⚫ | |||
| ⚫ | |||
| ⚫ | |||
| + | |||
| ⚫ | |||
| + | |||
| + | If you want to leave a party and the leader doesn't allow you to do it , you can just open a zombs.io tab in the same server to make a party and your main player to join it. Another option is to download a script that allows you to leave parties without having to ask your leader to kick you or open a new tab (Zombs is so sloppy coded...). |
||
| + | |||
| + | == Spells & Utility == |
||
| + | |||
| + | Spells and Utility can be useful later game. There are currently only two. |
||
| + | |||
| + | The Healing Spell heals your towers for 10 seconds. It does NOT heal your Stash or players. |
||
| + | |||
| + | The Timeout Utility causes no zombies to spawn for one wave. Using it cost 10,000 gold, and while it is in use, your score will not increase. |
||
| + | The Heal Towers spell heals towers within a certain radius. You can set the area it effects by hovering you mouse over it, and clicking to activate. You'll see a red circle with red crosses appear when it activate, and it will deactivate after a certain amount of time. |
||
{{Navbox Main}} |
{{Navbox Main}} |
||
[[Category:Zombs.io]] |
[[Category:Zombs.io]] |
||
| + | </div> |
||
| + | <br /> |
||
Revision as of 23:45, 19 June 2022
This is a list of some helpful Tips and tricks for Zombs.io. Feel free to add your own!
General
The gold stash is the most essential part of a base. You can only place one, and once you place it, it becomes immovable. The wave counter counts how far your base has survived. It will not start until you place your stash, and the higher wave you are, the stronger the zombie will be. It's recommended to mine about 500-700 stone & wood before placing your stash, and to place it at the beginning of the night so you have more time to prepare. You can active auto swing by pressing space, and you can deactivate by pressing space a second time. You can find trees and stone clustered together for easier farming. Dying will cause you to lose 25% of all you materials (Stone, Wood, Gold). Waves and towers will not reset, but your score will, so be careful! You can use Harvesters to increase mining productivity, to collect the resources, simply hit the Harvester once, or click 'Collect Resources'. The maximum number of towers you can place depends on the number of people in your party. It's equivalent to the amount available with 1 player, times the number of people in your party.
If you are a beginner first try a game by yourself. Then later on you can try with other people!
if you are a pro and doesn’t have much time make 4 tabs then join the same server, make sure each tab harvests at least 1000 stone and wood before starting the base. When you are building make sure the other tabs are harvesting resources with woody. If your other tabs have lots of money make sure to make them place and upgrade harvesters then sell them to get the money (you could earn a fortune if you make them kill a boss each with a C.A.R.L) after you completed a emerald core start closing the tabs and invite other people so more people can help repairing also it won’t be so laggy.
If you open 4 tabs be sure to check on them often not only to make sure they are alive but to reduce the chances of crashing
You could also place your stash and then place a layer of wood around it, then add more layers for extra security. You could also surround the giant block with towers to ad more security and increase defense. I suggest you use cannon towers on the corners and use some melee towers, mage towers and some bomb towers. Also add some arrow towers.
Base
Tip: Place your stash near a cluster of Trees and Stone for easy mining, but not too close, or it might obstruct your building placement.

If you place you stash too close to Monster Camps, in lower waves they can be a nuisance to your base.
It's not recommended to make your base perfectly symmetrical. While it may look nice, Zombies spawn differently each side of the base. However, it is recommended to build your base symmetrically initially, since this allows you to figure out which sides the zombies are stronger on, and the base can be quickly modified after.
If your only starting to play, then start building your base as soon as night starts. That way no zombies will spawn and thus you will have double the time to make your base and prepare for the waves
It's good to have mage towers behind the melee towers as the mage towers push the zombies away, meaning the melee towers don't take damage but do damage to zombies.
Don't use a layer of walls early game, as it tends to be a waste of resources. It may be necessary to use them later on as the zombies get progressively stronger. Try to place towers based off their radius, knockback, AOE and damage. Example: Bombs Towers have high radius and high damage, with slow fire rate; Arrow Towers is single target, fast firing and have a bigger and bigger radius when upgrading (approaching Bombs Towers' range at tier 8). Try not to build your base directly around Trees and Stones. They can make it hard to place building in the right spots, and leave your base with weak points. When going AFK in your base, it's recommended to AFK bomb, by using the Bomb weapon, and pressing space to autohit. You can use CARL to increase the effectiveness of this.
Upgrade order: First you must upgrade your gold stash, so you can upgrade everything else. After that, upgrade your resource harvesters and gold mines. It is recommended to upgrade your main knock-back towers after this. Everything else to upgrade or not is your own choice.
Bosses
After every 8th wave (9th, 17th, 25th, 33rd, 41st, 49th, 57th, 65th, 73rd, 81st, 89th, 97th, 105th, 121st), a boss wave occurs. If you attack every boss with C.A.R.L, when the boss dies you'll get a gold bonus (20k~500k depending on the wave).
The number of bosses the spawn is equal to the number of teammates in your party.
Towers hardly do any knockback to bosses.
Shop Upgrades
Try to only upgrade what you need. If your base can handle zombies on its own, focus on upgrading your pickaxe to help upgrade it faster. If it needs help, focus on upgrading your pickaxe and spear. While using spear, it's important to keep in mind you can take a lot of damage. Invest in a shield, or a Bow or Bomb for ranged combat. Health Potions can be useful when in a pinch. Use F to instantly use it, but keep in mind they cost 100 gold and have a cooldown.
Other Players
Attacking a base (when your party has placed a stash) with any tool/weapon will draw the towers' fire, which may be avoided easily by running in a circle around that base or moving away. Throwing bombs at a player that is escaping will almost always end with a missed shoot, pick the bow for ranged PvP fights. If escaping, use resource spots as cover from ranged attacks. It is easier to find other players at night, as following zombies will lead to a base.
Do not give new party members permission to sell buildings, or they might sell all your buildings. (Remember, only give sell permission to trusted party members!)
If you want to leave a party and the leader doesn't allow you to do it , you can just open a zombs.io tab in the same server to make a party and your main player to join it. Another option is to download a script that allows you to leave parties without having to ask your leader to kick you or open a new tab (Zombs is so sloppy coded...).
Spells & Utility
Spells and Utility can be useful later game. There are currently only two.
The Healing Spell heals your towers for 10 seconds. It does NOT heal your Stash or players.
The Timeout Utility causes no zombies to spawn for one wave. Using it cost 10,000 gold, and while it is in use, your score will not increase.
The Heal Towers spell heals towers within a certain radius. You can set the area it effects by hovering you mouse over it, and clicking to activate. You'll see a red circle with red crosses appear when it activate, and it will deactivate after a certain amount of time.
| Zombs.io |
|---|
| How to Play • Tools • Buildings • Resources • Pets • Hats • Shop • Parties • Enemies • Controls • Strategies • Tips & Tricks • Changelogs |