This is a list of some basic Strategies in Zombs.io. There are no perfect strategies or techniques, but learning these basic moves can help you get started. Feel free to add your own to this list!
Solo Base[ | ]
As of today, this guide for solo bases might be outdated.
The target of this strategy is to maximize the base as soon as possible while creating a safe area from zombies, players, and monsters.
While waiting for the gold to regenerate for upgrades, keep harvesting resources or hunting monsters.
No block should be lost until the end-game (wave 50+).
Place the gold stash in corner of the map and get over 10k in supplies before you place it down
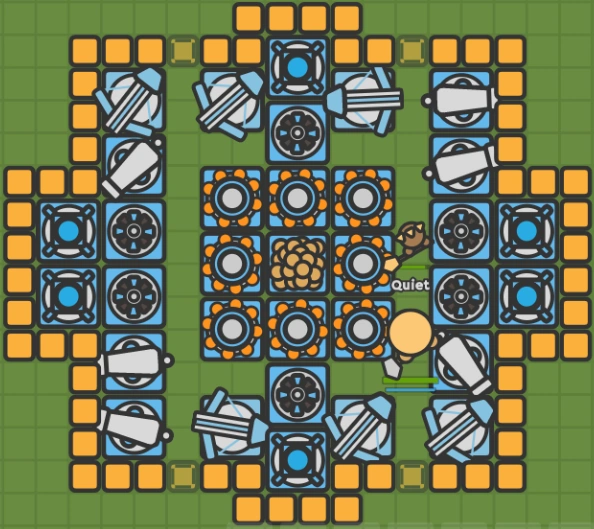
Note: unless stated otherwise, the upgrading chain is: stash > mine > resource harvester > wall/door/slow trap > arrow tower > cannon tower > bomb tower > mage tower > melee tower.
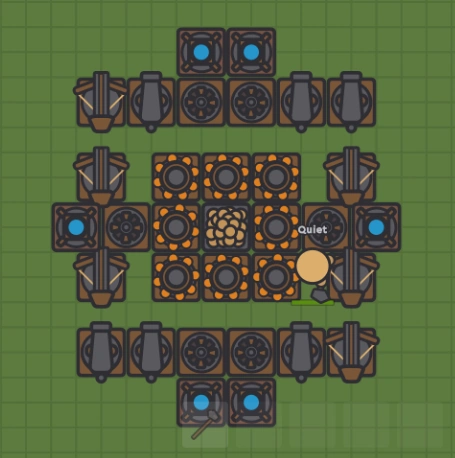
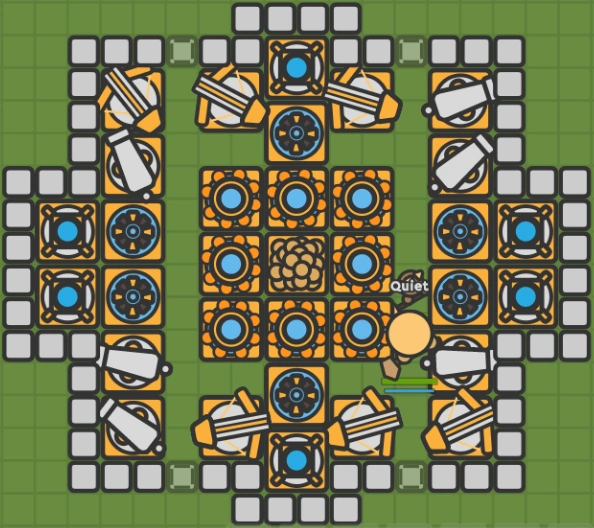
There are two main building parts, one is the box technique, the other is the open doorway. The box is simple by placing long range to short(box-cannon-arrow-mage-melee) this is good in first game as you can defend from everyside symmetrically and improve firepower. If you want a sustainable base follow the steps below.
Preparation[ | ]
Find a multiple resource spot, usually wood with rock is perfect to avoid spending too much in the pickaxe. It is best to create a 'farm base': a temporary base so that your character can gain enough gold to upgrade their axe. This significantly reduces time spent mining resources. An ideal resource spot will consist of one tree and one stone (combo).
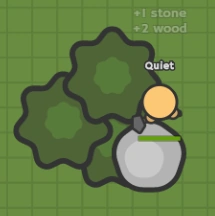
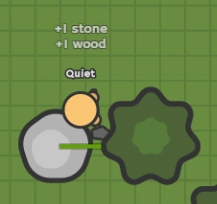
Consider that building too close to a monster stone may draw monsters, which can destroy tier I buildings with a single attack. While it's good to have an easily reachable stone, it's better not having it near the perimeter.
Keeping your gold stash on one edge and using harvester troll confuses zombies. They turn around and make big herd and fight themselves. This gives time for you to attack and your weapons have very little zombies to focus on.
Waves 0-7[ | ]
Build a 3x3 gold farm, which will have a walking area around. Also, place both Resource Harvesters at your resource spot and upgrade them right after gold mines. Don't forget to refuel and collect at the start of every day.
Place towers fold symmetry around, you may have 2 corridors or a whole circle around the gold farm. Also take note that the upper left will get attacked the most by a little bit.
If willing to have a C.A.R.L pet as support, buy the bow tier I: its damage is not what matters, it's purely to mark targets and let the pet get experience every round. Every wave attack a monster to let the C.A.R.L grow, since when you hit one monster, it targets the rest too. Make sure you attack a zombie, so C.A.R.L will attack.
Waves 8-11[ | ]

Buy the tier IV pickaxe; this upgrade can be delayed to wave 17.
Upgrade the wall to tier III, if not already done.
A boss will show up on wave 9. If you are training a pet, it should be time to evolve it to tier II.
Upgrade all buildings and the wall.
Buy the tier I bomb.
Waves 12-17[ | ]
Level up all buildings once.
If the pickaxe is still tier III, it's time to buy a new one before moving to the next step.
Buy the tier III spear and the tier II bomb.
Waves 18-24[ | ]
While waiting for the 32,000 gold to upgrade the stash (wave 20), harvest at least 3,320 wood and stone, which is enough for the whole tier VI.
Upgrade all buildings once. Once you're tier VI, your base should be good to go for now until wave 51 (end-game). You could also upgrade all your tools to tier IV by now.
Waves 25-35[ | ]
Saving up 100,000 gold for the tier VII stash takes a bit of time (wave 31), this is why it's good to have a corridor or any kind of space inside the walls so you can rest. While waiting for the gold to generate, keep harvesting resources: once to 12,800 wood and stone, you've done the heavy farming for the whole tier VII.
Upgrade gold mines one by one when possible.
Buy the tier V spear.
Waves 36-41[ | ]
Having the gold farm to tier VII, timeout can be considered worthy: in a day cycle, the gold production is now 24,000, meaning that timeout can give a flat 14,000 of profit. While this bonus income seems promising, gold won't be an issue in this build unless playing for a record: every use of this ability will give enough gold to stand a bonus round after wave 150.
The whole base can be tier VII by wave 41 if timeout is used three times, otherwise by wave 44. Aside from this case and emergencies, timeout is not used in this build.
Waves 42-55[ | ]
Patiently upgrade your mines, towers, and walls (walls can be delayed until later in end-game.)
Make a second wall around the base (only needed if zombies are starting to significantly damage towers).
Buy the shield tier I, then start upgrading the tools one by one by personal preference. By wave 150 all tools and the shield should be tier X.
Yellow zombies will start to spawn, so be careful not to die by melee damage: attack them from behind while they are targeting a wall.
Waves 56-100[ | ]
From now zombies can potentially break some wall blocks: if fighting alongside with a C.A.R.L. pet, remember to cycle around the base and not to focus on a single spot. It makes it a whole lot easier when you do this.
Purple zombies start to spawn at wave 90 and will inevitably deal some damage. To protect the base, the player should actively fight, knowing that 3-6 hits of a purple unit will destroy the top shield.
Every round ending, replace the missing walls with patience. If overwhelmed, use timeout.
Repair consume should still be lower than the mines' production.
Note: Walls aren't necessary unless zombies can deal significant damage to towers.
Waves 101+[ | ]
After this wave you will need to start upgrading to max if not already, add a double layer of walls only if zombies are doing damage to melee,arrows, etc...
Use a bow or a bomb because zombies can do melee damage if you use a spear, only use a spear if your attacking a boss or a demon etc...
I recommend upgrading your weapons after your base is fully upgraded.
- At wave 122, you'll start getting orange zombies so beware.
Weapons[ | ]
Consideration of weapons:
- Bow:
- Annoying to use, having to press action every shoot;
- Single target damage;
- High damage;
- Best choice for hordes of bosses and monsters.
- A powerful weapon in PvP, if you have a good aim it can deal more damage than the spear and kill players fast
- Good weapon to use along with C.A.R.L because you can keep your distance from the zombies
- Bomb:
- Easy to use holding the action button;
- AoE damage on a small area, short-range;
- Low single target damage;
- Good choice for zombie hordes, especially early on;
- Can be used along with C.A.R.L to kill the horde, especially while AFK.
- Spear:
- Easy to use holding the action button;
- Fast attack requiring melee range;
- Average damage;
- The best choice for hunting monsters in late-game, tier VI+;
- The best choice to kill zombies, but also dangerous.
The bow should be the first chosen weapon: it allows to stay away from targets and let the pet attack it, to get experience. While defending the base during the mid-game, bombs may be easier to use on stacked zombies. In the end-game, the spear can be considered a faster way to damage zombies, but if you do remember to upgrade your shield and maintaining your health. Use the space key for spears and bombs, that makes doesn't require clicking too much
Monsters and C.A.R.L.[ | ]
While the C.A.R.L. may look weak at the beginning, it can help against zombies later on: it will not suffer much damage while attacking more than the player.
Every 8 waves (until wave 121) a Boss will spawn: there won't be the necessity to contribute into killing it, but at least a player's shoot is required to get its tokens.
Killing monsters contribute to the pet's experience, but it should be considered good only if trying to level up the pet from late waves.
Woody:
While woody does not help killing zombies like C. A. R. L. , he can help harvest while you are away from keyboard (AFK).
Notice: Woody does not harvest wood and stone, wood and wood, or stone and stone at the same time.
Upon death, players will lose only 30% of their resources.
With this in mind, it could be possible to survive even with a couple of deaths and buy again the upgrades, especially in early or mid-game, considering that this will reduce the maximum wave reachable.
Record Making[ | ]
While following this build, begin the wall construction after having a full tier VII base and keep that wall to maximum two lines: never build a 3rd on late stages. Empower only one (max two) weapon to tier VI and leave the pickaxe to tier IV; the shield could stay to tier VI, but be careful after wave 90. The pet's help will be needed as well as active defense on end-game.
In this way, it is possible to have over 1000000 bonus gold to use in repairs. Note that every timeout used will yield 153586 bonus gold, but also make the game even longer: between wave 41 and 131 it could be called 30 times for another 220,000 gold bonus, but with 1h of delay. Note that this seems to be modified and timeout could be called every survived wave, meaning 45 uses in the example for 630,000 gold.
Keeping a more compact base, as shown in Final Consideration, is a good choice. It could even be used a map corner to have half sides to defend, but this may be considered bug exploiting: building in a corner can probably make the game infinite.
Team base[ | ]
Starting a team base can be challenging, as most players who join teams are inexperienced, and some players are only named "Player", making it harder to recognize. Some players may spam place towers/walls around the base. Then you will need to remove the offending towers, making a loss in resources. If you do not want to place the gold stash until you have 4 players, you might as well make quadruples of yourself because if you let other players join your clan, they will probably randomly place the gold stash, and you will not be able to sell it.
Before Placing Gold Stash[ | ]
Get a team of 4 (if you would like you can make clones/alts of yourself), then make sure all of your teammates have 100-250 stone and wood, and then give them the ability to sell buildings. Four fold symmetry is ideal if you have a party of 4. You will find that you can make very large bases now. Make sure that there aren't any resources nearby before placing your stash.
Wave 1 - 3[ | ]
Divide your team into classes. An example:
Class 1: the Defender. Kills zombies attacking the base (2 if possible).
Class 2: the Worker. Makes towers and walls and upgrades them.
Class 3: the Guard. They are important if your base is bigger than your screen. Some PvP players may break the walls and towers to get into your base and destroy the Gold Stash. Some defenders might not notice right away and some workers have no weapons to fend them off. If the breach is left unattended, some zombies might sneak in the base. Before applying these classes, make the team to get resources.
Do not forget to have Gold Mines surrounding your Gold Stash! Lay the first defenses after, and add doors to get in or out. It is recommended to make space between the gold stash and gold mines so you don't get stuck when you respawn after dying
Wave 4 - 6[ | ]
Defenders and Guards must have at least a tier II spear/bow, workers should have a tier III pickaxe, and walls and towers should be upgraded to tier II to be prepared for wave 9.
Wave 7 - 12[ | ]
Make sure you kill the bosses, because bosses give you a ton of gold. Save up for tier IV. Weapons should be at tier III or IV, pickaxes should be at tier IV or V, tier I zombies are also now at level 7-10, they can break tier I walls in 1 second!
Wave 13 - 21[ | ]
At wave 14, tier II zombies will start spawning, it's best to upgrade the walls to tier III, since tier II walls are now not as effective as defenses, at wave 17, the second boss wave will begin, and the bosses will have stat boosts, and there will be two, meaning that you will need to defend your base well. By wave 20, tier II zombies will be at level 5-7. You should upgrade the gold stash to tier IV.
Wave 22 - 35[ | ]
At wave 25, 2 more buffed bosses will spawn, and 1 wave later, the tier II zombies will be at level 7-10, along with level 1-3 tier III zombies spawning also. The walls should also be tier III, and towers should be at tier III-IV.
Wave 36 - 45[ | ]
Four bosses will spawn at boss waves, and tier III zombies will be at level 7-10, and tier IV being at lvl (level) 1-3, also most buildings should be at tier IV. Some players will go afk around this point. Make sure they get safe and out of the way before they go afk.
Wave 46 - 60[ | ]
At this point, tier IV zombies are disappearing. It's mostly tier V, level 3-5 zombies. The base should start being upgraded to tier V.
Wave 61 - 70[ | ]
The base should be fully upgraded to tier V, and partially upgraded to tier VI. Four bosses will now start spawning, and zombies are now tier VI, level 3-5.
Wave 71 - 90[ | ]
Zombies quickly go through tier VIII and go to tier IX level 1-3, nearing their final tier. The entire base is now tier VII, and a maximum of 5 bosses will now start spawning. At wave 86, the gold stash now NEEDS to be tier VIII.
Wave 101-124[ | ]
After 3 hours of work, the tier X zombies are here. There's no turning back, but zombies shouldn't be able to break the inner wall and the last wall, but if the last wall and the first defense towers are destroyed, it's all over; the defenders and guards should have a maxed bow/bomb to destroy the zombies, and the entire base has to be tier VIII.
By wave 124, all tier X zombies are now all at level 10.
Square Base[ | ]
A square base by yourself is good to get gold and resources quickly. However, if you want a high score, then you need a max party to optimize your chances.
Before you start, get at least 1K+ of stone and wood.
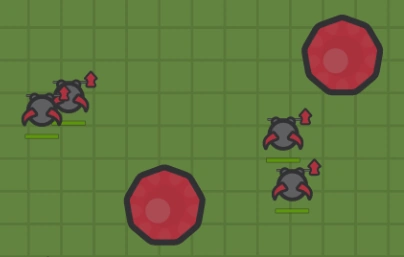
Find an large area that has little or no natural obstacles, including at the ruby(doing this may make your base ugly). Place your gold stash in the middle of it.
Tip: Do not place your Gold Stash too close to rubies or other player's bases. The red guys(also called demons) surround the ruby and can destroy tier 1 towers in a single second, including the gold stash. Other players might try to destroy the Gold Stash, and their actions are unpredictable.
Wave 1:
Place your gold mines around your stash.
Place a 2 block wall around the current base.
Place all bomb towers available on the left side the of wall.Next place all arrow towers available on the right side the of wall. Then Place all cannon towers available on the top side the of wall.And lastly, cover the bottom wall with mage towers.
Wave 2:
Place another 2 block wall around the whole area You should run out of all attack towers
Upgrade your Gold Stash Once after all the zombies are killed. Fix the broken wall.
Waves 3-4
Gather more resources. Have at least 135 stone and wood to upgrade the gold mine.Click on gold mine.Then press Shift+N. This will upgrade all the towers of the type
For wave 4, upgrade all the walls.Use the same keyboard shortcut above (Shift+N)
Wave 5
Make another wall. Be sure to patch up any damage. This is the second last wall.
Gather as much resources as you can to upgrade all the towers to tier 3
Wave 6
Upgrade your Gold Stash to tier 3
Buy a tier 3 pick. Gather as much resources to upgrade
TIP:Always upgrade gold mines first, walls next,and towers last
Wave 7
Boss in the next 2 waves, use the rest of your gold to buy and upgrade the spear to tier 3.
Buy a shield for protection
Wave 8
Upgrade the shield to tier 3
Wave 9
There's the boss! use your spear to kill the boss.You will get a ton of gold and tokens for killing it before towers kill it.
It may had made a hole in your base. Use the resources to fix and upgrade it.
Waves 10 - 17
Upgrade your gold mines and walls to tier 4. At wave 13 you already have your entire base at tier 4
At wave 15 and 16,keep upgrading your spear and shield until it was tier 5
At wave 17, There was 2 bosses! Use the same method to kill both. You are now rich!
Waves 18 - 25
At Wave 19 you are starting to see some blue guys. They can do mass damage. Use your spear to kill them.
Cover the rest of the base's range with walls and upgrade them to max
At wave 20, the base was partly upgraded to tier 5 and the pickaxe and spear must be tier 6
Base must be fully upgraded to tier 5
Every 8 waves, a boss will spawn
Waves 25 - ∞
Waves will continue forever until your base is destroyed or you close the game.
Waves 1-18: green zombies (tier 1 zombies)
Waves 19-34: blue zombies (tier 2 zombies)
Waves 35-52: red zombies (tier 3 zombies)
Waves 53-88: yellow zombies (tier 4 zombies)
Waves 90*-120: purple zombies (tier 5 zombies)
Waves 122*-∞: orange zombies (tier 6 zombies)
Bosses are on waves 9, 17, 25, 33, 41, 49, 57, 65, 73, 81, 89, 97, 105, 121 and so on.
*There are boss waves to fill the gap.
Pets[ | ]
C.A.R.L[ | ]
The C.A.R.L is used to fight enemies. It is generally more useful in later waves, especially while you are afk. However, you must level up your C.A.R.L. before it can become useful.
If you want a C.A.R.L, just click the 2 buttons and close out the tab. Then use the tokens you receive from killing the Demon Knight to evolve him. Since the game only detects if you click the button, it saves the click to your I.P or browser so you do not have to do it again. It works for the Horns and Woody as well.
Ideally, you should start training your C.A.R.L. right after you create your base. Your C.A.R.L. can be trained by fighting enemies. Your C.A.R.L. only attacks enemies if you have attacked the enemy first. Because of this, you have to constantly attack the enemy to efficiently level up your C.A.R.L. If you start to move away from the target or blow your whistle, your C.A.R.L. will return to you. Every night, you should attack the zombies from a distance and allow your C.A.R.L. to fight.
Every few levels, your C.A.R.L. will be able to evolve. Every time your C.A.R.L. evolves, it will get stronger. This is essential for fighting zombies, as they get stronger over time.
If you find that your C.A.R.L. cannot fight the zombies and keeps dying, find another base and help out, while leveling up your C.A.R.L. You can also make your own base with a clone, which shouldn't have any towers, so you can maximize the number of zombies killed by your C.A.R.L.
Once you decide to go afk, you should use your bomb from behind a wall and allow your C.A.R.L. to attack the zombies for extra points.
Woody helps players gather resources to use so the they do not need to use up so much time gathering more resources.
The pets have not updated for a long time.
you can also train your carl just find a monster stonre almost kill the monters and lety your carl do the final blow for points and then upgrade your pet (im sorry but who wrote that? ya fuvcqking child)
Tips For Experienced Players[ | ]
You may add narrow paths straight to your gold stash, which makes zombie behavior less violent. However, any objects other than harvesters or slow traps obstructing the path will negate the effect.
Tower placement can drastically change zombie behavior. For example, if you only place buildings on one half of your building area, they will only spawn on that side. This type of base is known as an edge base (it is generally built on the edge of the map). Also, if you only place buildings in one quadrant of the building area, they will only spawn in that quadrant. This type of base is known as a corner base (it is generally built in the corner of the map).
These bases allow players to plan where the zombies will go and where to put towers, but are easily destroyable by other players. If you are making one of these bases, consider surrounding your gold stash with harvesters. Note: Harvesters do not count as towers, due to the Harvester Troll created by the youtuber iXPLODE. If you use any other towers for the same purpose, the zombies will start spawning in unplanned locations, which can lead to the destruction of your base.
If your base is the same level as zombies you are doing amazing.
Keeping your gold stash on one edge and using harvester troll confuses zombies. They turn around and make big herd and fight themselves. This gives time for you to attack and your weapons have very little zombies to focus on.
Helping destroying Bosses[ | ]
If you're still losing to the bosses, here are a few simple tips:
- Always upgrade to max out with tools. A spear is normally the most helpful, bombs are the least for fending of singular enemies. A bow is good for ranged PvP and does a lot of damage to zombies, so choose wisely. Archers do not need that much shield but should have potions. Bombers can sit in their base spamming bombs with some shield just in case, and lancers need max shield, a lot of potions, and the diamond, ruby, or emerald spear. Never stay in an enclosed area while fighting bosses.
- If you want a C.A.R.L, just click the 2 buttons and close out the tab. Then use the tokens you receive from killing the Demon Knight to evolve him. Since the game only detects if you click the button, it saves the click to your browser cache so you don't have to do it again unless you disconnect. It works for the Horns and Woody as well.
- Pack potions if you want to go melee. Use the health potion when you're on very low health, do the same for your pet (you do not need pet potions, pets can be revived a few seconds after without any level loss).
- Buy a Shield (1k gold for tier I) for that extra bit of HP. Health potions don't affect it, but it regenerates over time..
- Bosses do a lot of damage; have gold and resources on hand and be ready to repair, they might make a small hole in your base.
- When fighting a boss, sometimes buildings will not be destroyed. Here are the tiers (In their respective waves) that won't be destroyed easily.
Tier IV for wave 9, tier IV partially tier V for waves 17 and 25, tier V for wave 33, tier VI until waves 41 to 65, and tier VII can last until around wave 85 before it gets destroyed (zombies spawn every 8 waves). Another tip: if your base can survive without having a building destroyed from waves 100-150, it can survive past wave 1,000 since the game sticks with orange zombies after wave 125.