mNo edit summary Tag: Visual edit |
No edit summary Tag: Visual edit |
||
| (29 intermediate revisions by 21 users not shown) | |||
| Line 1: | Line 1: | ||
| + | == Bosses == |
||
| − | * |
||
| − | :Bosses are on waves 9, 17, 25, 33, 41, 49, 57, 65, 73, 81, 89, 97, 105, and 121. |
+ | :'''Bosses''' are on waves 9, 17, 25, 33, 41, 49, 57, 65, 73, 81, 89, 97, 105, and 121. A base needs to be strong to handle boss waves. Bosses are extremely weak against high damage singular attacks such as melee towers or just your spear, bosses have high hp but only 1 spawns per person in your party |
| + | : |
||
| ⚫ | |||
| − | {| class="wikitable" |
||
| ⚫ | |||
| − | ! |
||
| − | !Begins at |
||
| − | ! Ends at |
||
| − | ! Time needed to reach |
||
| − | ! Type 1 |
||
| − | ! Type 2 |
||
| − | ! Type 3 |
||
| − | ! Type 4 |
||
| − | ! Type 5 |
||
| − | ! Type 6 |
||
| − | ! Type 7 |
||
| − | ! Type 8 |
||
| − | ! Type 9 |
||
| − | !Type 10 |
||
| − | |- |
||
| − | ! Tier 1 |
||
| − | | Wave 1 |
||
| − | | Wave 18-20 |
||
| − | | N/A ||[[File:zombie_T1_v1.PNG|50px|link=http://zombsio.fandom.com/wiki/File:Zombie_T1_v1.PNG]]||[[File:zombie_T1_v2.PNG|50px|link=http://zombsio.fandom.com/wiki/File:Zombie_T1_v2.PNG]]||N/A |
||
| − | |[[File:zombie_T1_v3.PNG|50px|link=http://zombsio.fandom.com/wiki/File:Zombie_T1_v3.PNG]]||[[File:zombie_T1_v4.PNG|50px|link=http://zombsio.fandom.com/wiki/File:Zombie_T1_v4.PNG]]||[[File:zombie_T1_v5.PNG|50px|link=http://zombsio.fandom.com/wiki/File:Zombie_T1_v5.PNG]]||[[File:zombie_T1_v6.PNG|50px|link=http://zombsio.fandom.com/wiki/File:Zombie_T1_v6.PNG]]||[[File:zombie_T1_v7.PNG|50px|link=http://zombsio.fandom.com/wiki/File:Zombie_T1_v7.PNG]]||[[File:Zombie_T1_v8.png|50px|link=http://zombsio.fandom.com/wiki/File:Zombie_T1_v8.png]]||[[File:Zombie_T1_v9.png|50px|link=http://zombsio.fandom.com/wiki/File:Zombie_T1_v9.png]] |
||
| − | |- |
||
| − | !Tier 2 |
||
| − | |wave 19 |
||
| − | | Wave 34-36 |
||
| − | |38 minutes||[[File:zombie_T2_v1.PNG|50px|link=http://zombsio.fandom.com/wiki/File:Zombie_T2_v1.PNG]]||[[File:zombie_T2_v2.PNG|50px|link=http://zombsio.fandom.com/wiki/File:Zombie_T2_v2.PNG]]||[[File:zombie_T2_v3.PNG|50px|link=http://zombsio.fandom.com/wiki/File:Zombie_T2_v3.PNG]]||N/A |
||
| − | |[[File:zombie_T2_v4.PNG|50px|link=http://zombsio.fandom.com/wiki/File:Zombie_T2_v4.PNG]]||[[File:zombie_T2_v5.PNG|50px|link=http://zombsio.fandom.com/wiki/File:Zombie_T2_v5.PNG]]||[[File:zombie_T2_v6.PNG|50px|link=http://zombsio.fandom.com/wiki/File:Zombie_T2_v6.PNG]]|| N/A |
||
| − | |[[File:zombie_T2_v7.PNG|50px|link=http://zombsio.fandom.com/wiki/File:Zombie_T2_v7.PNG]]|| N/A |
||
| − | |- |
||
| − | ! Tier 3 |
||
| − | |Wave 35 |
||
| − | |Wave 52-54 |
||
| − | |1 hour and 10 minutes||[[File:zombie_T3_v1.PNG|50px|link=http://zombsio.fandom.com/wiki/File:Zombie_T3_v1.PNG]]||[[File:zombie_T3_v2.PNG|50px|link=http://zombsio.fandom.com/wiki/File:Zombie_T3_v2.PNG]]||[[File:zombie_T3_v3.PNG|50px|link=http://zombsio.fandom.com/wiki/File:Zombie_T3_v3.PNG]]||[[File:zombie_T3_v4.PNG|50px|link=http://zombsio.fandom.com/wiki/File:Zombie_T3_v4.PNG]]||N/A |
||
| − | |[[File:zombie_T3_v5.PNG|50px|link=http://zombsio.fandom.com/wiki/File:Zombie_T3_v5.PNG]]||[[File:zombie_T3_v6.PNG|50px|link=http://zombsio.fandom.com/wiki/File:Zombie_T3_v6.PNG]]||[[File:zombie_T3_v8.PNG|50px|link=http://zombsio.fandom.com/wiki/File:Zombie_T3_v8.PNG]]||[[File:zombie_T3_v7.PNG|50px|link=http://zombsio.fandom.com/wiki/File:Zombie_T3_v7.PNG]]||[[File:zombie_T3_v9.PNG|50px|link=http://zombsio.fandom.com/wiki/File:Zombie_T3_v9.PNG]] |
||
| − | |- |
||
| − | !Tier 4 |
||
| − | |Wave 53 |
||
| − | |Wave |
||
| − | 88 |
||
| − | |1 hour and 46 minutes||[[File:zombie_T4_v1.PNG|50px|link=http://zombsio.fandom.com/wiki/File:Zombie_T4_v1.PNG]]||[[File:zombie_T4_v2.PNG|50px|link=http://zombsio.fandom.com/wiki/File:Zombie_T4_v2.PNG]]||[[File:zombie_T4_v3.PNG|50px|link=http://zombsio.fandom.com/wiki/File:Zombie_T4_v3.PNG]]||[[File:zombie_T4_v4.PNG|50px|link=http://zombsio.fandom.com/wiki/File:Zombie_T4_v4.PNG]]||[[File:zombie_T4_v5.PNG|50px|link=http://zombsio.fandom.com/wiki/File:Zombie_T4_v5.PNG]]||[[File:zombie_T4_v6.PNG|50px|link=http://zombsio.fandom.com/wiki/File:Zombie_T4_v6.PNG]]||[[File:zombie_T4_v7.PNG|50px|link=http://zombsio.fandom.com/wiki/File:Zombie_T4_v7.PNG]]||[[File:zombie_T4_v9.PNG|50px|link=http://zombsio.fandom.com/wiki/File:Zombie_T4_v9.PNG]]||[[File:zombie_T4_v8.PNG|50px|link=http://zombsio.fandom.com/wiki/File:Zombie_T4_v8.PNG]]||[[File:zombie_T4_v10.PNG|50px|link=http://zombsio.fandom.com/wiki/File:Zombie_T4_v10.PNG]] |
||
| − | |- |
||
| − | !Tier 5 |
||
| − | | Wave 90 |
||
| − | |Wave 120 |
||
| − | |3 hours||[[File:zombie_T5_v1.PNG|50px|link=http://zombsio.fandom.com/wiki/File:Zombie_T5_v1.PNG]]||[[File:zombie_T5_v2.PNG|50px|link=http://zombsio.fandom.com/wiki/File:Zombie_T5_v2.PNG]]||N/A |
||
| − | |[[File:zombie_T5_v4.PNG|50px|link=http://zombsio.fandom.com/wiki/File:Zombie_T5_v4.PNG]]||[[File:Zombie_T5_v5.png|50px|link=http://zombsio.fandom.com/wiki/File:Zombie_T5_v5.png]]||[[File:Zombie_T5_v6.png|50px|link=http://zombsio.fandom.com/wiki/File:Zombie_T5_v6.png]]||[[File:Zombie_T5_v7.png|50px|link=http://zombsio.fandom.com/wiki/File:Zombie_T5_v7.png]]||[[File:Zombie_T5_v8.png|50px|link=http://zombsio.fandom.com/wiki/File:Zombie_T5_v8.png]]||[[File:Zombie_T5_v9.png|50px|link=http://zombsio.fandom.com/wiki/File:Zombie_T5_v9.png]]||[[File:Zombie_T5_v10.png|50px|link=http://zombsio.fandom.com/wiki/File:Zombie_T5_v10.png]] |
||
| − | |- |
||
| − | !Tier 6 |
||
| − | |Wave 122 |
||
| − | |N/A |
||
| − | |4 hours and 4 minutes||[[File:Zombie_T6_v1.png|50px|link=http://zombsio.fandom.com/wiki/File:Zombie_T6_v1.png]]||[[File:Zombie_T6_v2.png|50px|link=http://zombsio.fandom.com/wiki/File:Zombie_T6_v2.png]]||[[File:Zombie_T6_v3.png|50px|link=http://zombsio.fandom.com/wiki/File:Zombie_T6_v3.png]]||[[File:Zombie_T6_v4.png|50px|link=http://zombsio.fandom.com/wiki/File:Zombie_T6_v4.png]]||[[File:Zombie_T6_v5.png|40px|link=http://zombsio.fandom.com/wiki/File:Zombie_T6_v5.png]]||N/A |
||
| − | |N/A |
||
| − | |[[File:Zombie_T6_v8.png|50px|link=http://zombsio.fandom.com/wiki/File:Zombie_T6_v8.png]]||[[File:Zombie_T6_v9.png|50px|link=http://zombsio.fandom.com/wiki/File:Zombie_T6_v9.png]]||[[File:Zombie_T6_v10.png|50px|link=http://zombsio.fandom.com/wiki/File:Zombie_T6_v10.png]] |
||
| − | |} |
||
| − | |||
| ⚫ | |||
| ⚫ | |||
== Monsters == |
== Monsters == |
||
| + | These are the enemies that spawn around the red things scattered around the map. These are popularly known as demons because of the way they look. They are more annoying than they are strong. If you are just starting out, '''do not''' attempt to kill them, otherwise they will kill you for sure. |
||
| − | Monsters are zombies that are spawned around a ruby. They can also be known as Demons. |
||
| + | |||
| + | If the monsters are hit by a player or a defense, they will attack whatever hit them. However it is only if you attack them. If you just pass around them or move them by accident, they don't care. Three monsters will spawn a red rock. When one dies, another one will simply respawn. Also if they get too far from their home rock in pursuit of you, they will return. These more or less get in the way; they aren't a huge threat at all. |
||
| + | |||
| + | killing monsters are a great way of leveling up your C.A.R.L, especially is you are in a high level base and have a low level pet. |
||
| + | |||
| + | The bosses look like these monsters, just bigger, deal more damage, have more hit points, and ''will'' attack you and your base. |
||
| + | |||
| + | <br /> |
||
| + | |||
| + | == Players and their bases == |
||
| + | Other players in your server might cause significant annoyances and they are the only PvP action you'll ever get in this game. |
||
| + | |||
| + | Bases are the most annoying things just get an emerald spear and try to kill a wood base you will fail especially because bases hit through shield. Best time to destroy a base is when they don’t have any defenses at all |
||
| + | Bases only attack you if you whack it or it’s owner or the owner’s pet a few times and will stop attacking you after a few minutes |
||
| − | Normal monsters are not hostile to the player unless they attack first, and will ignore you if you run away. They are a hassle to deal with and do not provide a reward when they are killed, so you should obviously ignore them. |
||
| + | Players might attack your base, spam your chat, or kill you. While that might be symptoms of No Life Disease, players are easy to counter. |
||
| − | Every 8 waves, an extremely large, powerful Monster will appear as a boss. Even if you are well-prepared, it can and will destroy almost anything in its way of the Stash in just a few hits, and takes quite a lot of punishment before it goes down! |
||
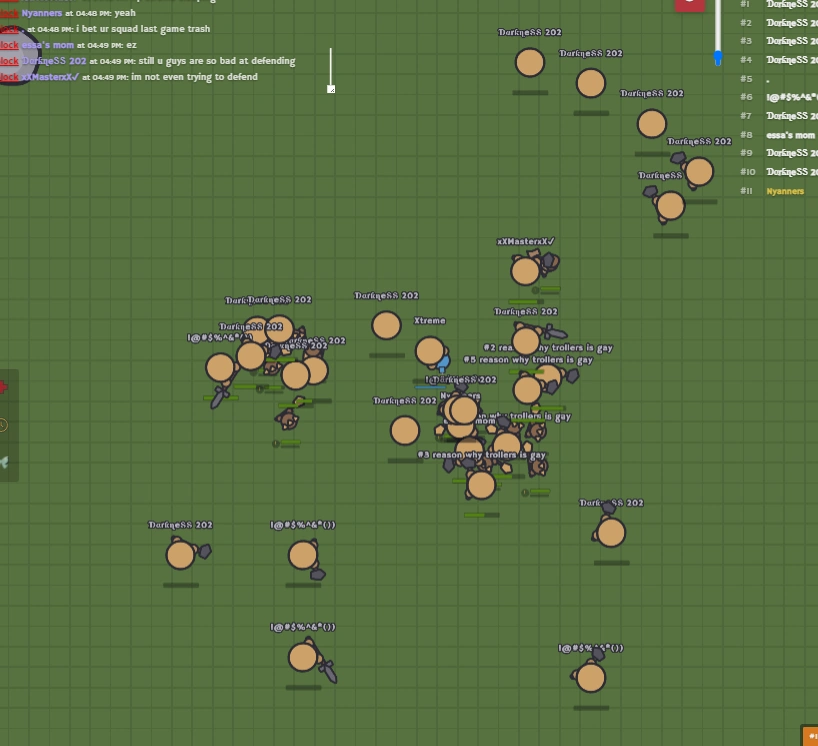
| + | ''Symptoms of No Life Disease'' |
||
| − | If you attack a boss at least once before it dies, you and your party get a lot of tokens and gold. (each one you attack gives you more gold) |
||
| + | [[File:Loltrollers.png|center|frameless|317x317px]] |
||
| + | <br /> |
||
* |
* |
||
Revision as of 15:43, 29 May 2022
Bosses
- Bosses are on waves 9, 17, 25, 33, 41, 49, 57, 65, 73, 81, 89, 97, 105, and 121. A base needs to be strong to handle boss waves. Bosses are extremely weak against high damage singular attacks such as melee towers or just your spear, bosses have high hp but only 1 spawns per person in your party
- Zombies won't spawn at night until you place the gold stash. It goes on forever after tier 6 [orange zombies] at type 10, at wave 141.
- Having more players in your party increases the number of towers and zombies.
Monsters
These are the enemies that spawn around the red things scattered around the map. These are popularly known as demons because of the way they look. They are more annoying than they are strong. If you are just starting out, do not attempt to kill them, otherwise they will kill you for sure.
If the monsters are hit by a player or a defense, they will attack whatever hit them. However it is only if you attack them. If you just pass around them or move them by accident, they don't care. Three monsters will spawn a red rock. When one dies, another one will simply respawn. Also if they get too far from their home rock in pursuit of you, they will return. These more or less get in the way; they aren't a huge threat at all.
killing monsters are a great way of leveling up your C.A.R.L, especially is you are in a high level base and have a low level pet.
The bosses look like these monsters, just bigger, deal more damage, have more hit points, and will attack you and your base.
Players and their bases
Other players in your server might cause significant annoyances and they are the only PvP action you'll ever get in this game.
Bases are the most annoying things just get an emerald spear and try to kill a wood base you will fail especially because bases hit through shield. Best time to destroy a base is when they don’t have any defenses at all
Bases only attack you if you whack it or it’s owner or the owner’s pet a few times and will stop attacking you after a few minutes
Players might attack your base, spam your chat, or kill you. While that might be symptoms of No Life Disease, players are easy to counter.
Symptoms of No Life Disease
| Zombs.io |
|---|
| How to Play • Tools • Buildings • Resources • Pets • Hats • Shop • Parties • Enemies • Controls • Strategies • Tips & Tricks • Changelogs |